Billing System Integration with PayPal

Billing System Integration with PayPal lets advertisers buy ad inventory for a campaign through PayPal in Revive Adserver. Ad network admins set the price for clicks and impressions, and advertisers pay online.
What it does
- Advertisers view the inventory the admin has added and buy what they need, and the purchase goes into their campaign.
- The admin receives a notification email whenever an advertiser pays through PayPal.
- In the example, 1000 impressions cost $4 and 1000 clicks cost $10.
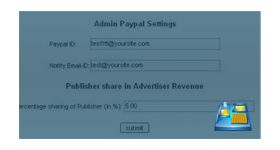
The admin signs in, opens the My Account tab and sets the PayPal ID and notify ID, then sets the cost for a block of impressions and a block of clicks. Advertisers use the Add Inventory tab to choose the number of clicks or impressions and the campaign ID from a drop-down list.
Full feature details
The billing system integration with PayPal plugin for revive ad server is used to purchase the ad inventory for the advertiser’s ad campaign.
The plugin provides an interface for the admin to set a price for the fixed number of clicks and impressions. For example, if admin sets the banner price for thousand impressions and clicks, the advertiser can able to purchase the fixed set of impressions or clicks using the PayPal account.
The plugin allows the advertiser to view and purchase all the ad spaces added by the admin, once the advertiser purchases the ad inventory it will be added to their ad campaign.
Instructions to be followed by admin and advertiser
Admin login
The user has to log in as admin and switch to “my account tab”.
The section allows a user to access PayPal id and notify id. When the advertiser had made the payment in PayPal, the notification email will be sent to notify id.
In new tab, the admin can add following details they are
Cost of impressions
The plugin sets the price amount for thousand impressions as $4
Impressions: 1000
Clicks: 0
Cost: $4
Cost of clicks
The plugin sets the price amount for thousand clicks as $10
Impressions: 0
Clicks: 1000
Cost: $10
Advertiser login
The user has to log in as advertiser and switch to “add inventory” tab.
In that section, the advertiser can view all the ad inventories add by admin.
From the available inventories, the advertiser can choose a number of clicks or impressions and campaign id, the drop list box is provided for choosing the details.
Frequently Asked Questions
Included with every plugin
- Installation and setup help. We help you install the plugin on your Revive Adserver and confirm that it is working.
- 3 weeks of free support from the day of delivery, covering installation, configuration and any bug in the plugin.
- Your Revive Adserver version. Choose your version in the Product Versions drop-down on this page.
- Licenses to fit your setup. Choose Single Domain, Multi Domain or Source Code in the License drop-down.
Need changes made for your setup? Custom work and consulting are available. Contact us with your requirements.
Common questions
Which Revive Adserver versions does this plugin support?
The supported versions are listed in the Product Versions drop-down on this page. If you run a version that is not listed, contact us before ordering.
What does the free support cover?
For 3 weeks from delivery we help with installation, configuration and any bug in the plugin. Custom development and problems caused by other plugins or your hosting are not part of the free support, but we can quote them separately.
Can you adapt the plugin to my setup?
Yes. Custom work is available. Tell us what you need and we will quote it.